Choose one of the two scenarios below and follow the instructions. As with other merging, this is one of the rare things within CloudCME that cannot be undone, so deactivate very carefully.
Scenario A: If you have a user who is no longer at VU/VUMC and has NOT set up a second profile with another email address:
These steps convert the account from a Single Sign On, VU or VUMC account into a non-VUMC account. The user does not have to set up a second profile as was the case in the previous system.
- In the administration section, Membership then Membership Manager

- Search and locate the user
- Confirm that it’s the correct user account
- Unlink SSO Account
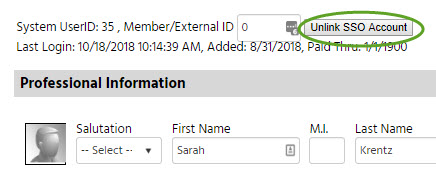
- Note that this button disappears if you go to other tabs in Membership Manager. If it’s disappeared, go back to Step 1 and begin again.
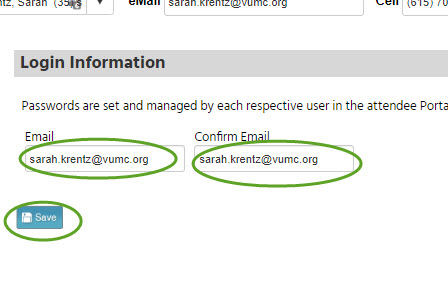
- Go to Email

- Enter the user’s new email address in both boxes and Save
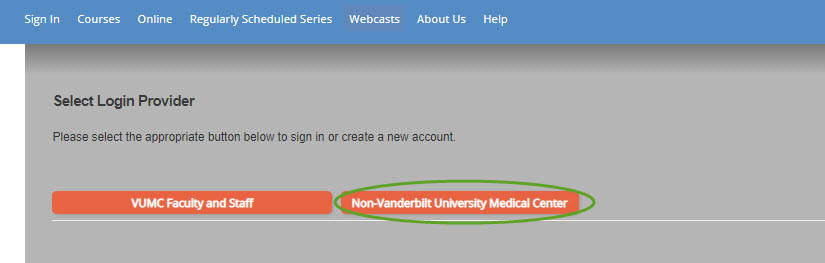
- The user can now log in to the Non-VUMC. They will need to use the password reset to gain entry for the first time
Scenario B: If you have a user who is no longer at VU/VUMC and has already set up a second profile with another email address. OR if you have a user with one VU and one VUMC account that you are merging together:
These steps deactivate the Single Sign On from the account that will be deleted. As a safety check, CloudCME does not allow active SSO accounts to be merged.
- In the administration section, Membership then Membership Manager
- Search and locate the user whose account you will be deleting in the merge
- Confirm that it’s the correct user account
- Unlink SSO Account
- Merge the unlinked SSO account into the remaining account the same way as other merges (full instructions here)